Beam Plate Installation Instructions
General Tools and Materials
-
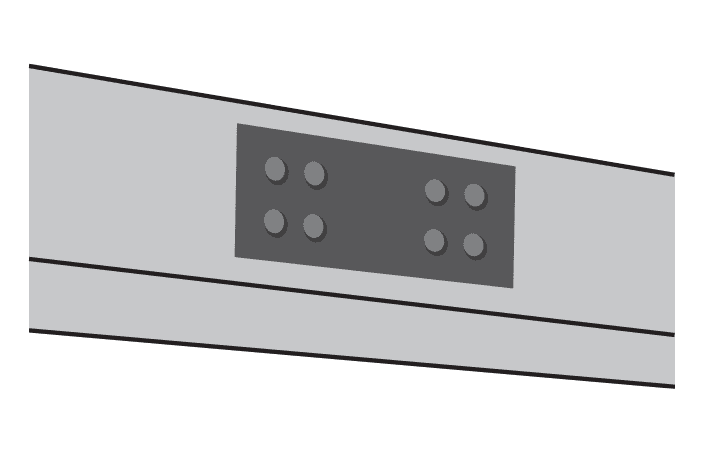
 Beam Plate
-
 Loctite® PL® Premium® 3X Construction Adhesive
-
 Caulk Gun
-
 Caulk or Permanent Marker
-
 Screw Gun / Drill Driver & Bits
-
 Drywall Screws
-
 Utility Knife
-
 Ladder
-
 Clean Cloth
-
 Tape Measure
-
 Pencil
-
 Safety Glasses
-
 Square / T-Bevel
WARNINGS:
- Be sure to obey all safety rules and recommendations set forth by tool manufacturers.
- Wear safety glasses during the entire installation process.
- Always comply with clearances set forth by the manufacturer of stoves, fireplaces, furnaces, and any other heat source.
Directions
Step 1
Determine Mounting Location
- Hold the strap to the desired location. If the strap is too long use a utility knife and straight edge to trim it to size.
- Use a pencil to trace the mounting location.
Step 2
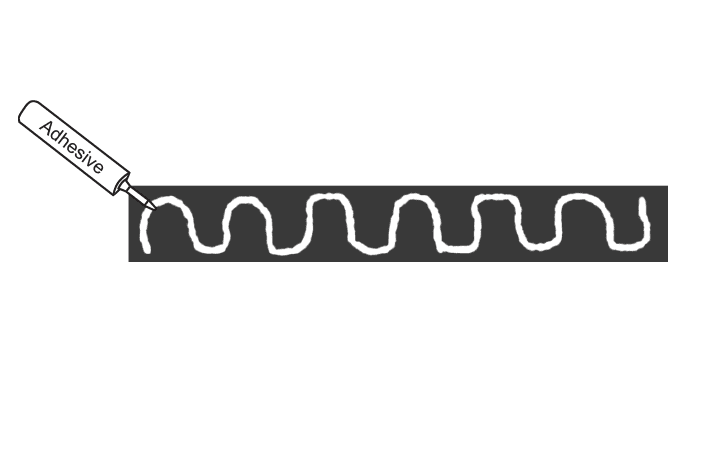
Apply Adhesive
Apply a ¼” bead of adhesive to the back of the strap, avoiding the edges.
Step 3
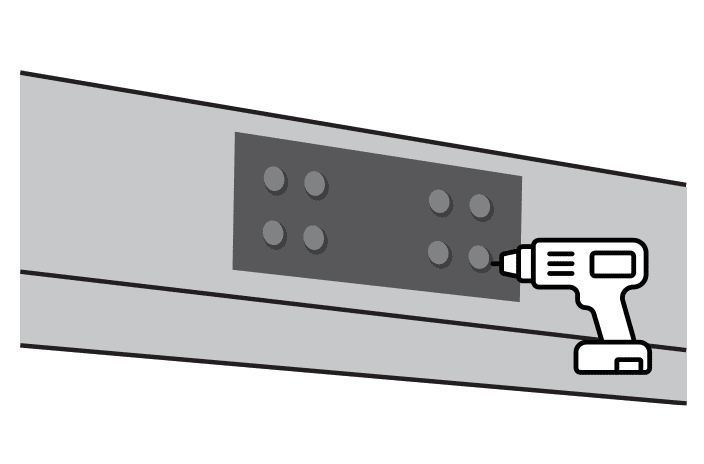
Install Strap
- Line the strap up with the marks made in Step 1. Press firmly on the strap working from the center to ensure good contact between the adhesive and the beam.
- Screw the strap to the beam.
- Wipe any excess adhesive with a clean cloth.
HINT: Placing screws at the base of nuts/bolts will help conceal them.
Step 4
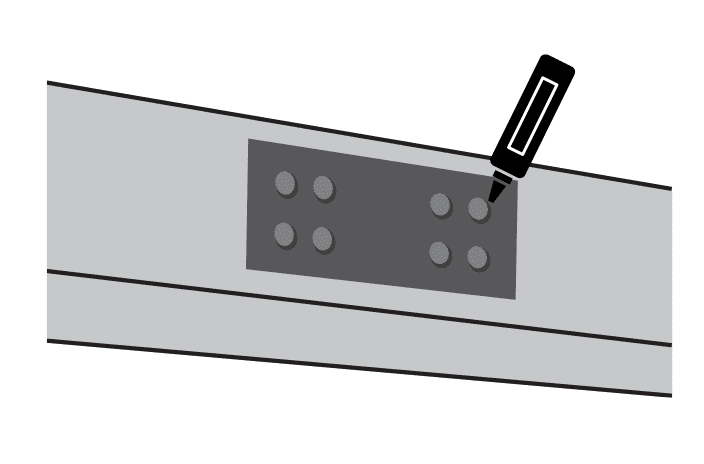
Touch-Up
- Look at the strap from the ground. If the strap is not laying flat against the beam install additional screws.
- If screw heads are visible, hide them using black caulk or permanent marker.