Basements can play many different roles in your home. They might be a place to store everything from holiday decorations to camping gear, but they’re also ideal for entertaining and relaxing. Or, they might be converted into an extra bedroom, a man cave, a bar or any other kind of room you want for your home.
Of course, you want your basement to look as good as the rest of your home, and in many cases that means figuring out what to do about those important but often unattractive basement support beams.
What Are Basement Support Beams?
Basement support beams serve a critical function: Along with foundation walls, they hold up the internal weight of your home. The ends of the basement support beams are located in the foundation wall and are held up by one or more support posts called lally columns.
Whether these beams are made from wood or metal, they’re designed for function rather than form. That means they often stand out from the rest of the room — and not necessarily in a good way.
Since you can’t simply remove or replace basement support beams, finding a way to work with (and around) them is an important part of creating the look you want in your basement.
Whether you’re redoing your entire basement or just want to cover up those unappealing beams, this DIY project can typically be done in a single weekend and will completely transform the look of your basement.
Basement Makeover With Faux Beams
Faux Wood Beams customer Cinnamon Cisney knew she wanted to replace her unsightly basement support beams, so she searched for support beam cover ideas and eventually turned to Faux Wood Beams for DIY inspiration. Thanks to Cinnamon’s hard work and these chic basement support beams, the results are absolutely stunning.
Cinnamon wanted to transform her basement support beams with a basement pole cover. In the “before” photo, you can see just how unsightly the bare supports were.

BEFORE: These bare support beams were an unsightly but important part of the basement.
An essential support post in the center of the room was needed to brace the ceiling, but both its location and its appearance posed a problem.
Cinnamon wanted to make her basement look better, but didn’t want to bring in a contractor – who might take awhile to finish the project – or spend too much money. Since she had some time to do the project herself, and preferred that approach, she found her solution on FauxWoodBeams.com.
Cinnamon’s solution was elegant in its simplicity: She ordered three Custom Resawn beams in Burnt Mocha and used them to cover the support structure.
Installing Custom Resawn Basement Support Beams
Here are the simple steps Cinnamon took to install these three basement support beams:
- After ordering the basement support beams, Cinnamon turned to our faux wood beams installation page for instructions. All she needed was a tape measure, some construction adhesive, caulk, screws, a stud finder and a way to cut the beams.
(Note: When following installation instructions, always make sure you uphold safety precautions like watching out for power tool cords and wearing the appropriate safety gear.)
- Next, Cinnamon began the installation. Because our faux wood beams are hollow, and designed with three sides, she slotted them effortlessly over the horizontal support. She then secured them to the ceiling with simple mounting blocks and screws.
- For the vertical post, she ordered a four-sided beam, which completely enclosed the support all the way from the floor to the overhead beams.
- After cutting them to length – a simple task requiring only a regular wood saw – Cinnamon connected the beams into a seamless “T” shape.
- When installing the vertical beam over the lally column, Cinnamon slid the three-sided beam over the lally column and then added the fourth side. Most of Faux Wood Beams’ fourth-sided beams come in two pieces; it’s a three-sided beam with a removable fourth side, which makes for easy installation.
- One challenge was that despite Cinnamon’s seamless carpentry, it was still possible to see the seams where the three beams joined at the T-junction. To solve that problem, she searched for accessories and purchased flexible beam straps.
- The rubber straps Cinnamon ordered are the finishing detail, and give the beams the appearance of real structural beams. The molded rubber straps are glued directly onto the beams and cover any seams or joins.
The molded design of the straps resembles authentic iron straps, so in addition to hiding the seams between the beams, Cinnamon’s solution gave her gorgeous room even more character.
DIY Basement Pole Cover Results

After: Molded rubber straps provide the finishing details to make the basement support beams look like real structural beams.
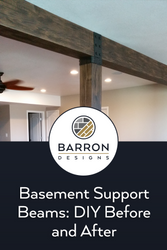
The results speak for themselves. The hardwood floors and matching ceiling fan, along with the look of century-old, beautiful basement support beams that didn’t cost a fortune, make this finished basement appear stylish and chic — and no one would guess that it’s a DIY project!
When Cinnamon emailed us her pictures, she told us how pleased she was with the way her project turned out: “We’ve finally completed our basement. We are very happy with the product and have received so many compliments on how ‘real’ they look!”
DIY Basement Support Beams
Faux Wood Beams customers can easily take on a project like Cinnamon’s with the help of our simple-to-follow faux wood beams installation guide.
Our customer service team is always standing by for help to answer questions on everything from pricing and how to estimate square footage for our products to more specific installation questions like how to secure basement support beams to the ceiling or install rubber straps.
Are you looking to upgrade your basement or any other part of the interior or exterior of your home? See what our Resawn Wood Beams can do for you and start your DIY project today!


