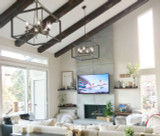
Wood paneling used to seem as dated as a pair of plaid bell-bottoms, but times have changed. Today, it can be part of a refreshing home update. Gone are the drab wood panels of the ’60s and ’70s; in their place are wood paneling options that feel right at home in a variety of contemporary settings.
As wood panels have become more diverse and stylish, they are being used in more and more spaces. A fully paneled room can add extra warmth and coziness, and a wood-paneled accent wall can create interest in an otherwise plain room.
As wood paneling’s popularity has boomed, so has the number of styles and colors available. It’s easier than ever to find paneling that will suit the aesthetic of your room. From a mid-century modern vibe to a rustic farmhouse feel, the right paneling can help you achieve the look you want.
Cut Faux Wood Paneling
The Right Wood for the Job
Whether you’re doing a full house renovation or just creating an accent wall, advance planning is critical. A solid plan will help you determine your project’s estimated costs, the amount of paneling you’ll need to purchase and other materials you will need to complete the project.
Using faux wood paneling rather than real wood will help you maximize your budget and still get the look you want. Because the lightweight material is ideal for DIY projects, you won’t need to hire an expert installer — and that means even more savings.
Real wood panels require a significant amount of hardware and effort to install, but when you’re dealing with faux wood paneling, you’ll just need some basic supplies and a little time. And yes, we do mean “a little time.” Depending on your project, you can be finished and ready to enjoy your room in just a day or a weekend.
Preparing for Your Project
If you’re doing the project yourself, two of the most critical aspects will be:
1. Buying the proper amount of faux wood paneling
2. Cutting the panels properly
Our customer service team can help you calculate how much paneling you’ll need for your project or you can use the handy calculator located next to the quantity selector on the panel page, so we’ll focus on how to cut faux wood paneling. Before you begin, make sure you have everything you need for the job:
- Clean cloth
- Tack cloth
- Wire brush
- Screw gun or drill driver
- Wood-cutting saw with finish blade
- Tape measure
- Level
- Chalk line or laser line
- T-square
- Caulk gun
- Pencil
- Small paint brush
- Water
- Safety glasses
(See our installation guide for a complete list of tools and materials.)
Once you’ve collected your panels, related materials and tools, you’re ready to start. Cutting the panels properly is key to your success when working with faux wall panels. Leaving them with too much overlap can be fixed, but cutting them too small is a bigger problem, so be sure to measure carefully before cutting. If you’ve never taken on a project like this (or even if you have), the best rule to remember is to measure at least twice, and cut once.
The panels need to have a perfect fit, so measure the space that each panel is going to fill. In some cases, the wall may not be the same width at the top as it is at the bottom, so don’t assume the wall is perfectly square. Measuring and double-checking (or triple-checking) the numbers for each panel you’re placing will help you avoid unpleasant surprises as you work your way up the wall during the installation.
You’ll also need to measure the locations of things like outlets, light switches and windows. After taking these measurements, use a pencil to mark their locations on the back of the panel. Then check the measurements one more time before you cut.
Making the Cut
After you’ve confirmed that you have all the panels you need to complete the task and you’ve marked where the panels need to be cut to accommodate any outlets and other obstacles, it’s time to cut your faux wood panels.
Any good wood-cutting saw will work. A circular saw works well to provide a straight, even cut. For short cuts, such as cuts around an electrical outlet or light switch, you might want to use a hand saw or jig saw. Use a slow but firm movement to make the cuts.
Always wear safety glasses and gloves when you cut the panels and be sure you can clearly see where the cuts should be made. If you’re doing the project by yourself, you should also secure the panel to the sawhorses or table you’re cutting on so the panel stays in place while you’re making the cuts. When you’re finished with that step, you’ll be ready to move on to the rest of your installation.
If you’re considering faux wood panels to get the look you want without the hassles of real wood, visit the Barron Designs website for design ideas and inspiration.
Shop Related Products


