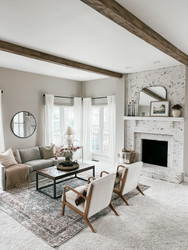
It’s true, any room or space enhanced with wood beams makes you stop and notice. As you marvel at the impressive beauty of beam-lined ceilings, you likely think such a grand architectural element certainly doesn’t come easy, or cheap, right? Wrong!
Believe it or not, not all ceiling beams are solid wood. In fact, most of the beams you’ve seen are likely faux wood, meaning they are hollow, 3-sided decorative beams. This option is more affordable and easier to achieve with a little skill and DIY ambition. And speaking of DIY we aren’t just talking about installation, faux beams are something you can even make yourself!
In this article, we help you decide if it's best to DIY it, or if you should purchase premade, ready-to-install faux beams instead. Then, we’re showing you how to make faux wood beams, and sharing a few pro tips to make sure they’re durable and long-lasting.
Premade Faux Beams vs. DIY Ceiling Beams
Before you decide to make your beams, it's important to consider all your options. If you aren’t motivated to build your own beams, premade faux wood beams are a smart solution. Let’s take a look at the pros and cons of each.
Pros of Premade Faux Wood Beams:
|
Pros of DIY Faux Beams:
Cons of DIY Faux Beam:
|
How to Make Faux Wood Beams: Step-by-Step
The step-by-step instructions below, prepared by experienced carpenter, Mike Berner, are for making a faux ceiling beam that has a real-beam look. As you read through the steps, be sure to keep in mind the level of woodworking experience and expertise you have. It's not recommended to DIY ceiling beams if you aren't comfortable with the tools and the process.
Before You Get Started
The boards you choose for your beam should match the look you want to achieve. Are you looking for a rustic, industrial, or farmhouse aesthetic? A farmhouse-style space, for example, would coordinate perfectly with the nicks and notches of reclaimed barn wood. Regardless of the board type you choose, the edges have to be straight before you start building, and the boards cannot be warped or bowed.
After you’ve chosen and prepped your boards, check your ceiling for flatness. Hold a straight edge, like a level, across the ceiling where you plan to install your ceiling beams. Take note of any gaps that are more than ⅛ inch between the level and the ceiling. You will use this information in step 2.
Then gather the following tools and materials:
- Table saw or track saw
- Featherboard
- *(2) 1x6 pieces of your beam material
- *(1) 1x8 piece of your beam material
- Wood glue
- Screwdriver
- Sawhorses
- Reinforced packing tape
- 18-gauge brad nails
- Stain or paint and finishing supplies
- Sandpaper
*These instructions are for a 6” high by 8” wide beam. Be sure to gather beam material that corresponds to your desired height, width, and length.
Step 1: Cut the Miters
Set your table saw to make a 45-degree bevel. Adjust the fence so the narrow face between the bevel cuts is at least 5 ½ inches wide.
Cut a bevel on both long edges of the 1x8 board. Use a featherboard to keep the material against the fence and press the board to the table as you feed it through the saw.
Then cut the same bevel on just one edge of the 1x6 boards.
Step 2: Back-Bevel the Top Edges
Your 1x6 boards are the sides of the beams, and the top edge of those boards will meet the ceiling. If your ceiling isn’t completely flat, it helps to cut a slight bevel on the top edge, opposite the 45-degree bevel made in Step 1.
If you found an ⅛ inch or smaller gap when you checked your ceiling for flatness, cut a 5-degree bevel. If you find one or more gaps that are ¼ inch or larger, cut a 15-degree bevel.
Pro Tip: To avoid splitting your wood, don’t cut a steeper bevel than necessary.
Step 3: Reinforce the Seams
With bevel cuts down, and the points of the miters touching, lay the three boards across your sawhorses.
Then, join the boards across the seams, then down the lengths of the seams using reinforced packing tape.
Pro Tip: To make the next step easier, secure your boards together using clamps with scrap wood.
Step 4: Apply Glue and Fold
Flip the boards over and spread wood glue along the beveled edges.
Fold the edges up. Feel free to use more packing tape to hold the tops in place while the glue dries. To pin the miter together at the ends, use a few 18-gauge brad nails.
Step 5: Close the Corners
With the packing tape still on and the glue still wet, run the shaft of your screwdriver along each corner. This presses the corner of the miter completely closed to make an invisible miter that will last. Take care to not rip the tape as you burnish the corners.
Step 6: Finish Your Faux Beam
Once the glue is completely dry, remove the packing tape. Sand and stain or paint your beam to suit your style.
Now, you’re ready to install your beam!
Pro Tip: Faux beams have uses that aren’t limited to the ceiling. You can use these steps to make mantles, columns, and beams of other sizes too!
Should You DIY Your Faux Beams?
The decision to DIY faux beams or purchase premade faux wood beams comes down to your skill level and design preferences.
To help you decide if making your faux beams is right for you, ask yourself these questions:
- What aesthetic do you want for your space?
- Do you have the woodworking skills to achieve the look you want?
- Are you comfortable with basic woodworking tools?
- Do you have the required tools on hand?
- How much time do you want to dedicate to the project?
- Are you comfortable with prepping, sanding, and staining your materials?
- Do you know how to handle warping, splitting, or inconsistencies in your beam material?
If you find that you don’t have the time, the knowledge, or the equipment for a faux ceiling beam DIY project, it's best to purchase faux wood beams that are already made, painted, and ready to install.
Faux Wood Beams That Are Ready to Install

Beachwood Faux Wood Beams in Java
If you’re not an avid DIY enthusiast, and you just want to get the job done, ready-made beams are the perfect solution. Barron Designs’ collection of realistic faux wood beams arrives at your doorstep ready to install.
Installing our faux wood beams is simple, and only requires one other person and a few hours of your time. By following our detailed instructions, you can completely transform the look and feel of any room in your home.
Our beams are made to your exact specifications and come in a wide array of authentic colors, including an unfinished option for ultimate customization. Are you ready to bring the warmth and charm of wood beams into your home?
Shop Faux Wood and Real Wood Beams
Shop Related Products


